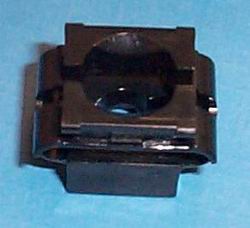
DA-4600 Line
Mini Snap-In Receptacle
|
|
| To Determine Receptacle Size and Stud Grip Length Required |
Step 1: Find the Support Thickness Range that applies to your Support Thickness in the table. The Part Number of the receptacle needed is stated to the right of your applicable Support Thickness Range.
| Receptacle Selection | ||||
| Support Thickness Ranges | Receptacle Part Numbers | Z | ||
| inch | mm | inch | mm | |
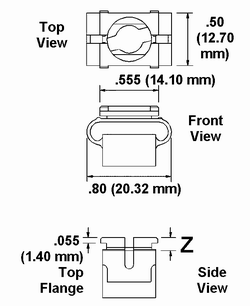
| 0.032-0.050 | 0.81-1.27 | 4604-12-BK | 0.108 | 2.74 |
| 0.051-0.100 | 1.30-2.54 | 4604-13-BK | 0.158 | 4.01 |
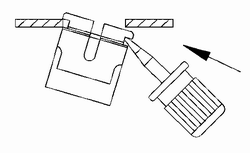
- Support Thickness
- The thickness of the material where the receptacle will be mounted. See Figure below.
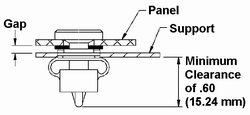
Step 2: Calculate the Panel Gap Thickness. Then, in the
table below, find the column that applies to the receptacle you
selected above and find the Panel Gap Thickness range that
applies to your calculated Panel Gap Thickness. The stud
length needed is to the far right of your applicable Panel
Gap Thickness range.
|
Panel Gap Thickness = Panel Thickness + Gap Thickness
|
|
|||||||||||||||||||||||||||||||||||||||||||||||||||||||||||||||||||||||||
| Installation |
| Support Panel Preparation |
|
| Installation Procedures | |
|
|